Table of Contents
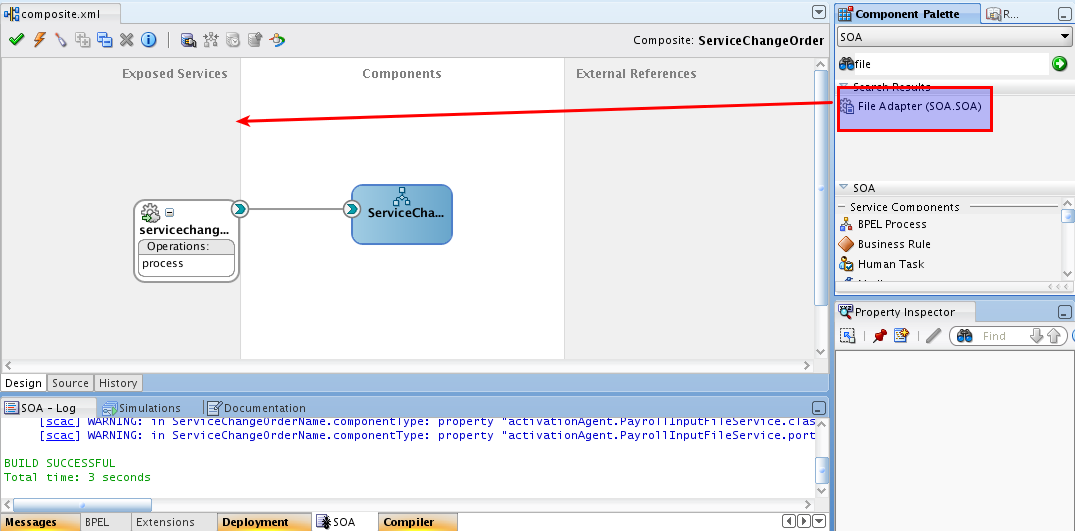
Create a file adapter
- Drag the file adapter component into the SCA assembly.
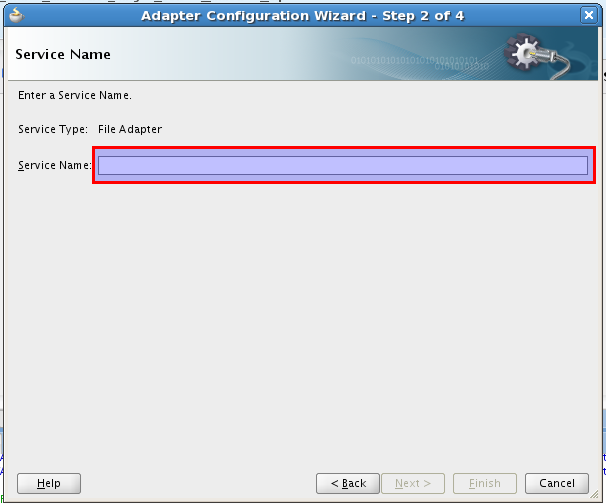
- Click next for the first window of the Adapter Configuration Wizard.
- Choose as ServiceName ReadParametersFileService and click next.
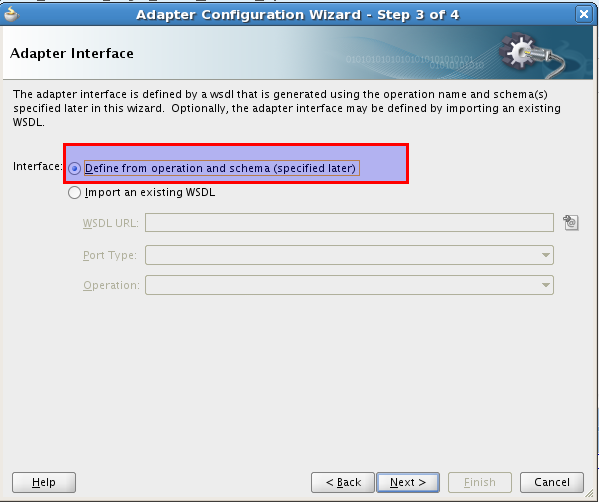
- Choose define from operation and schema (specified later)
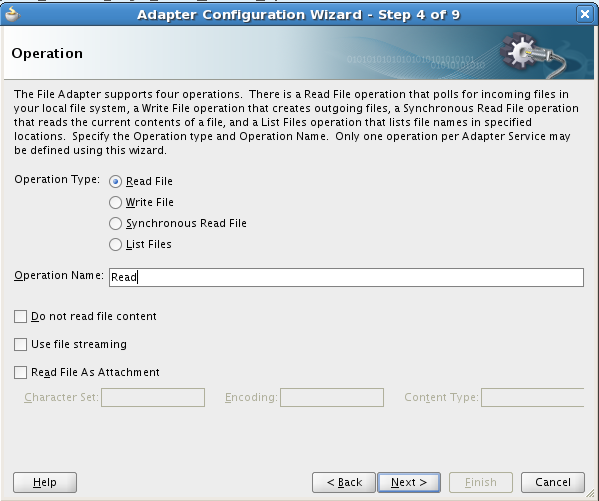
- Choose the read operation type. Name the operation as Read
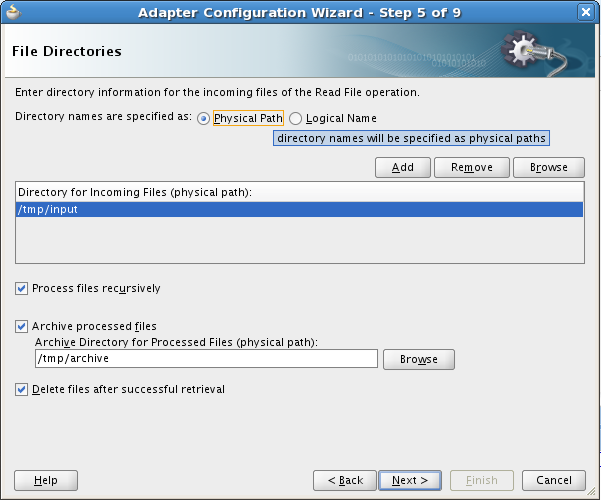
- Define as input directory: /tmp/input.
- Define as archive directory: /tmp/archive
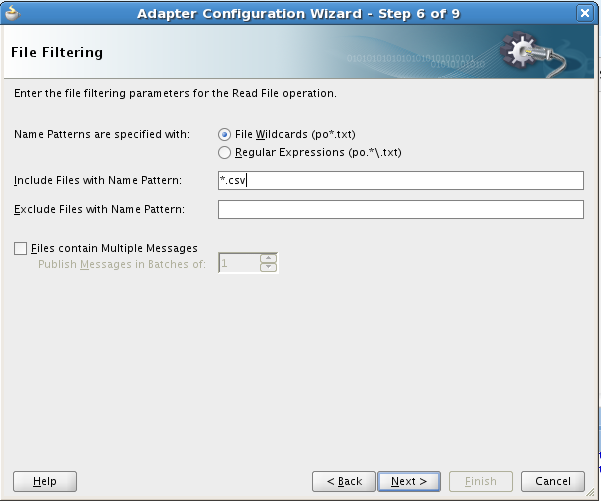
- Choose as include file names patterns: *.csv
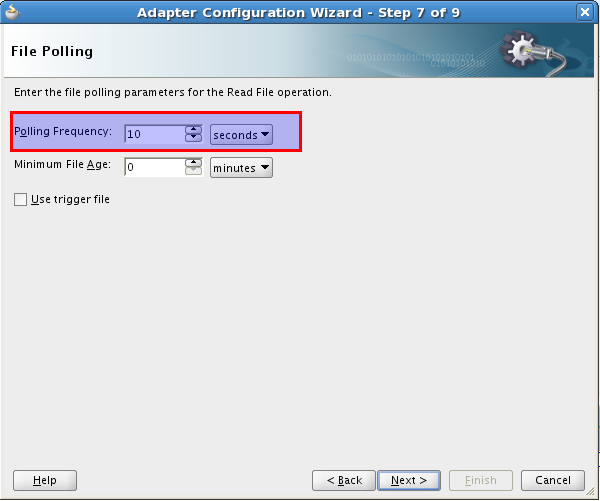
- Change the polling frequency from 1 minute to 10 seconds.
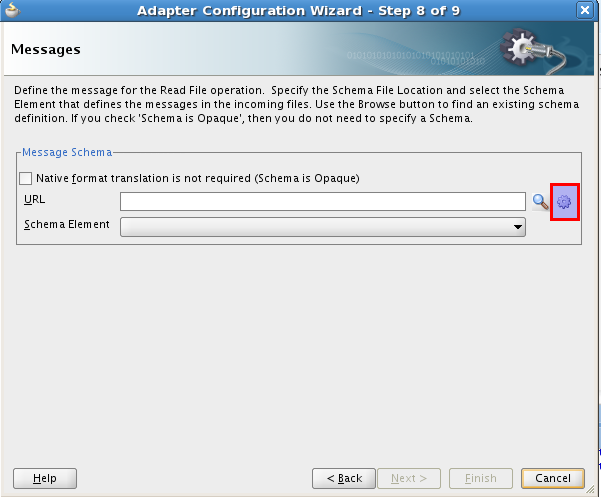
- Click the button Define Schema for Native format
Create schema for the input files
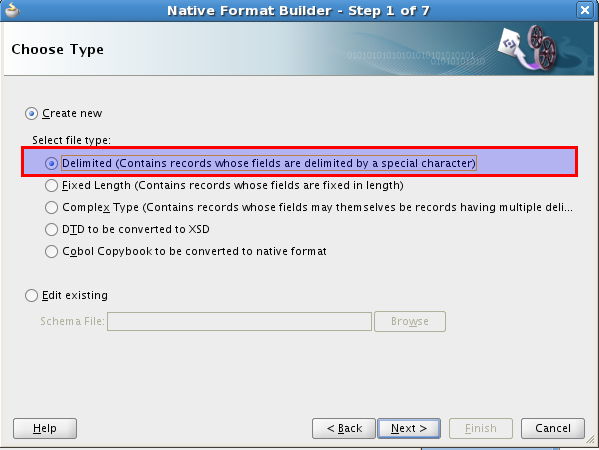
- Click next on the Native format builder wizard welcome screen.
- Select to create a new schema for delimited space files.
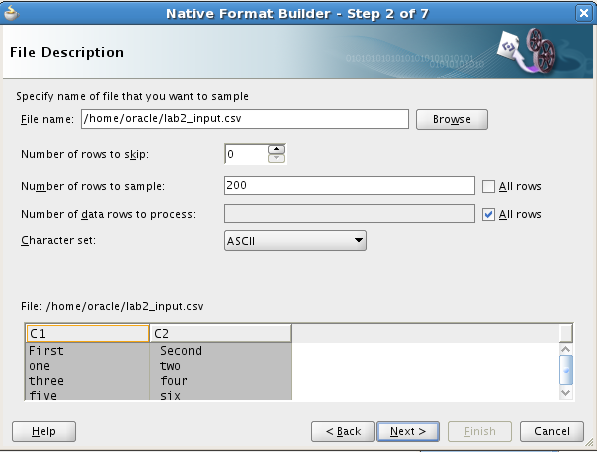
- Select as sample file this file: input.csv
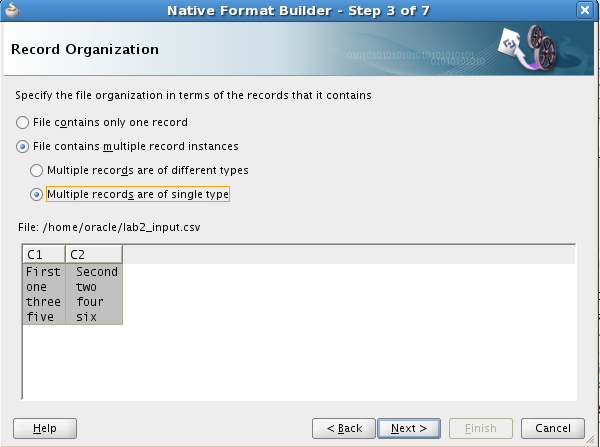
- Indicate that the sample file has multiple records of a single type
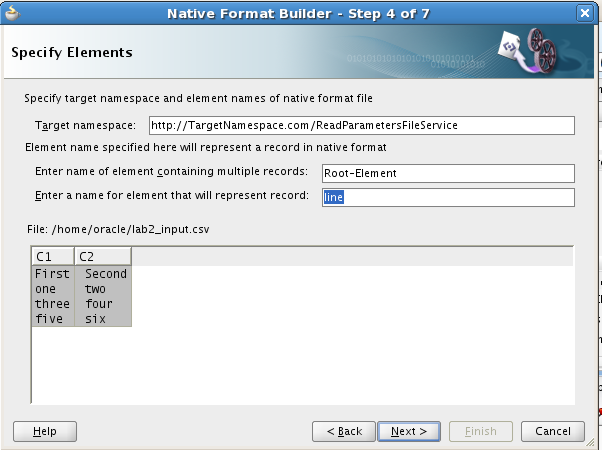
- Name line for the name to represent a record
- Accept the default delimiters.
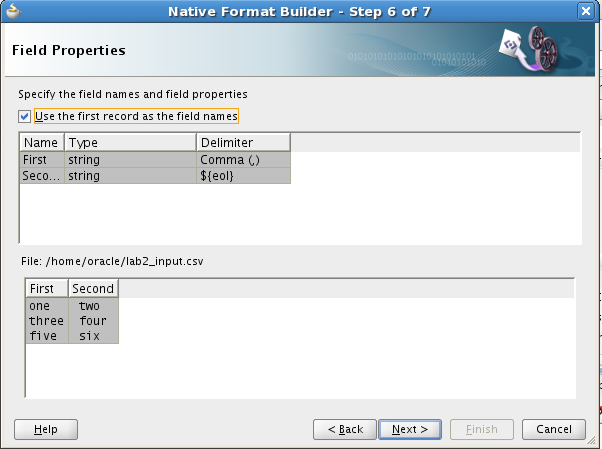
- Select the checkbox which indicates to use the first record as field names
- Accept the default schema file name. Click the test button and observe the result.
- Click the finish button

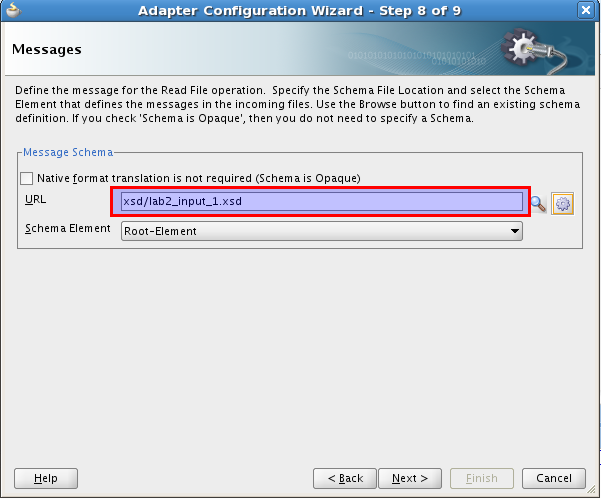
Finish the adapter Configuration wizard
- On the adapter configuration wizard, the URL for the created schema file should be specified.
- Finish the adapter configuration wizard
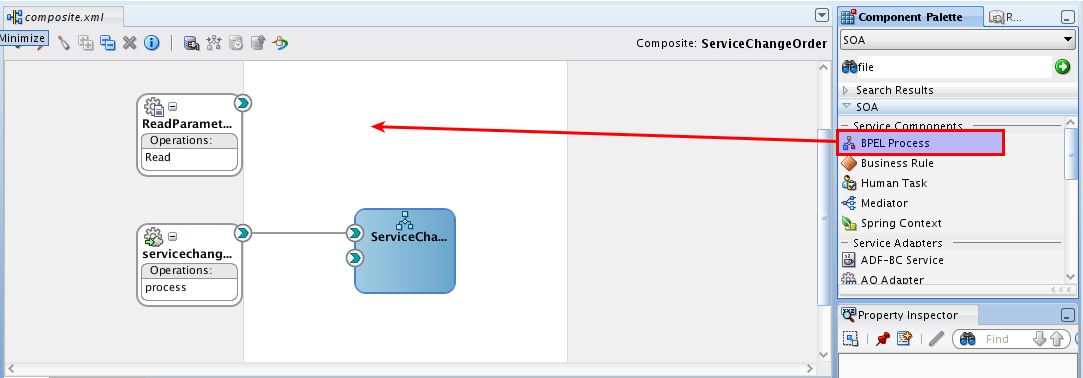
Create a BPEL process
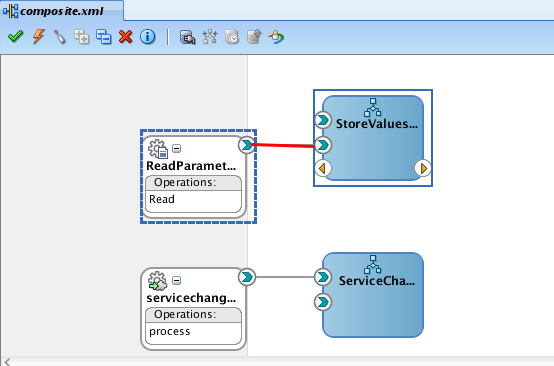
- Create a new BPEL process by dragging BPEL component to the composite view.
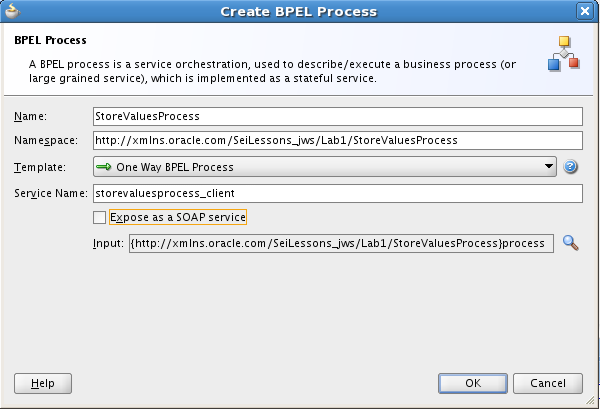
- Name the process as StoreValuesProcess. Choose version 1.1. Choose template for One Way BPEL process. Disable the Expose as Web Service checkbox. Choose the lab2_input_1.xsd as input
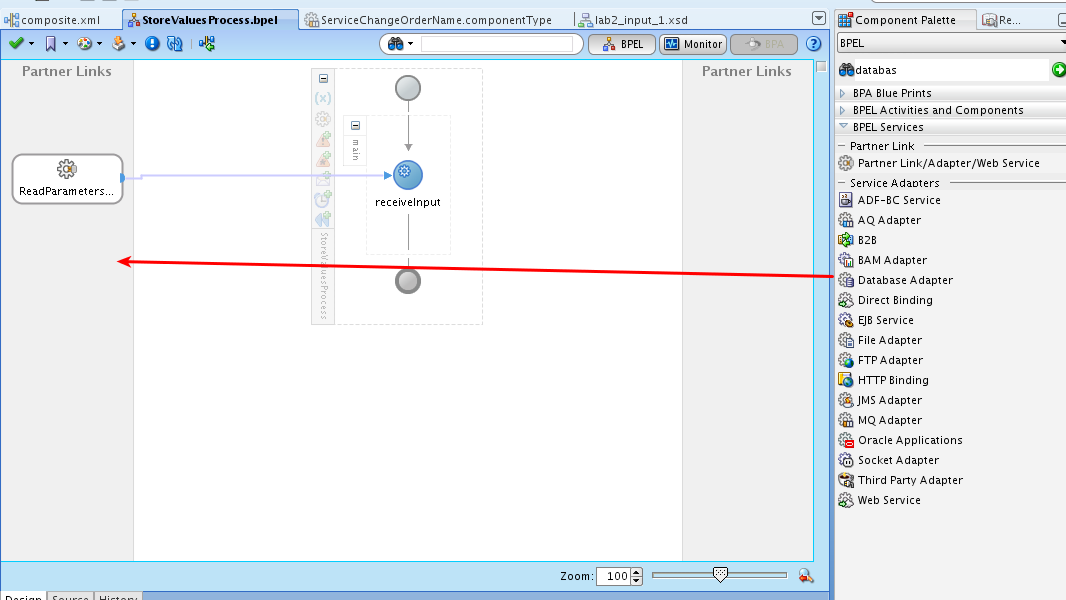
- Connect the ReadParameter shape to the new BPEL process.
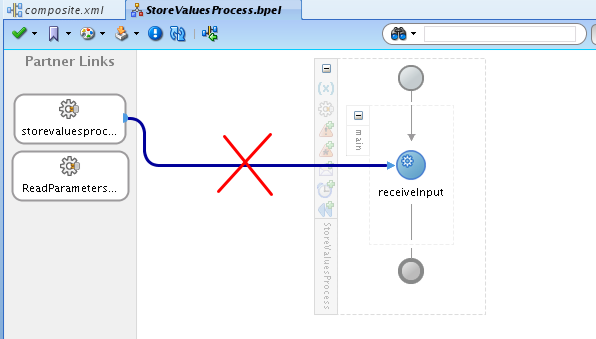
- Open the new BPEL process and delete the current connection
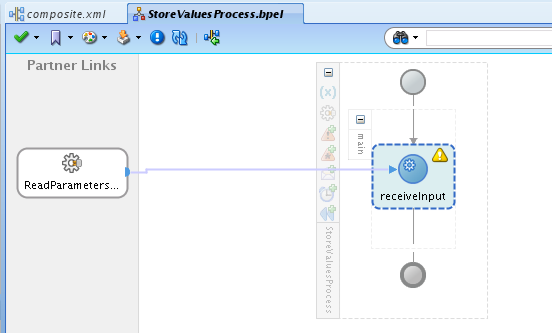
- Connect the ReadParametersFileService to the receiveInputShape
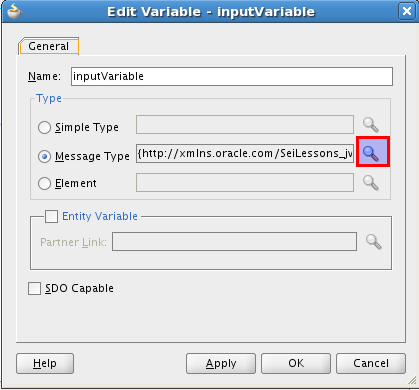
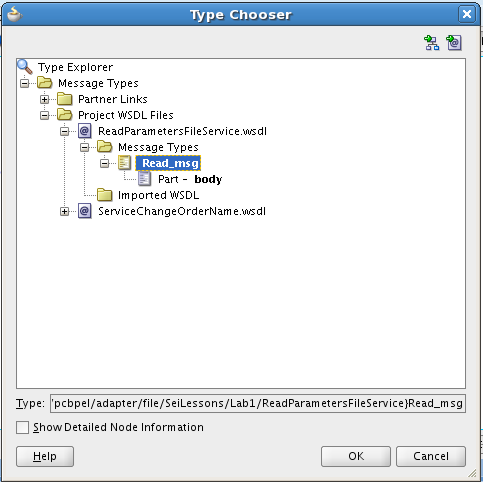
- Change the input variable type by double->clicking on the variable field. 'Edit Variable'
- Change the type of the variable to {ReadParameterFileService}Read_msg

Test file service
- Deploy the ServiceChangeOrderProcess
- Open browser: http://localhost:7001/em
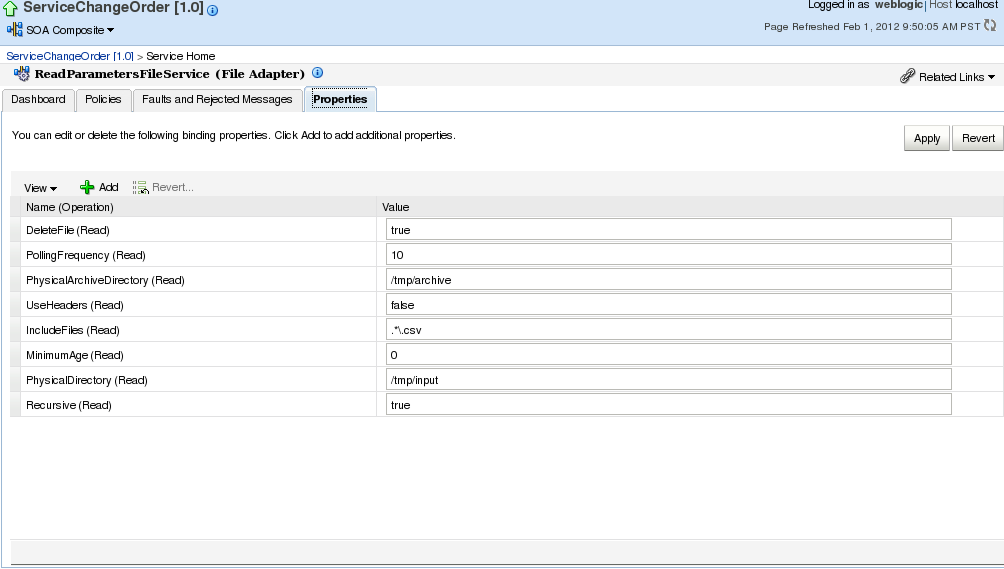
- In the ServiceChangeOrder process check the ReadParametersFileService.
- Notice the properties tab
- Test the deployed process copying a .cvs file to the incoming folder (do not forget to create the directories and check the permissions)
- Check the new instance.


Interact with a DB
The goal of this section is to demonstrate how to interact with relational databases.
Prepare the DB
First, make sure that the database has been configured as described in VM - Configure database.
Open the Oracle DB console, and use the sqlplus utility for managing the database using the console. This is an alternative to using the apex web interface described below. You can learn more about sqlplus here. Using the console is also useful for quickly recreating database tables and insert test data.
You can pipe a script containing multiple commands to the sqlplus program:
sqlplus soa_user/welcome1 < script
Create a Database Connection
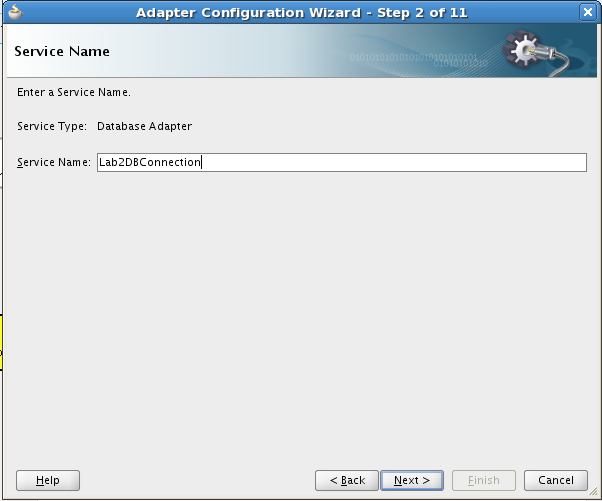
- Drag the Database Adapter component to the partner link layer
- Name the Adapter service name as Lab2DBConnection
- Use the created DB connection, e.g.: eis/DB/mydb
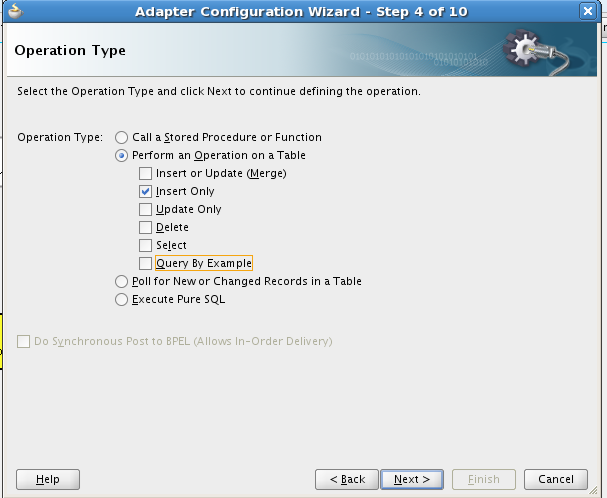
This name must match the DBAdapter data pool name configured in the Oracle WebLogic Server Administration Console (http://localhost:7001/console) - Choose to only insert elements in the table:
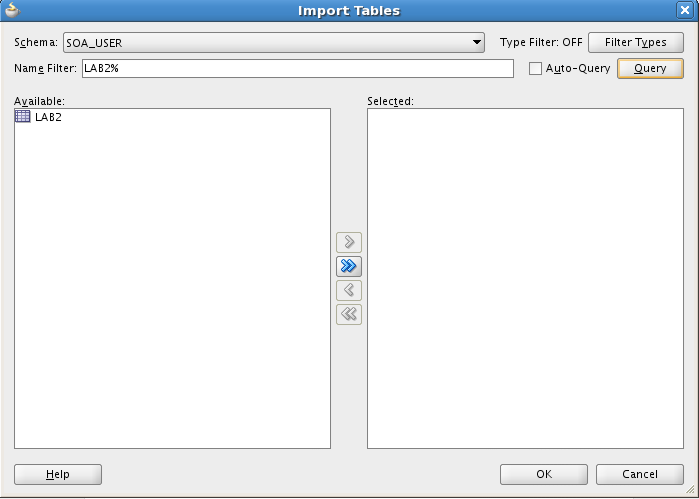
- Choose the lab2 table:
- Choose the first column for primary key:
- Finish adapter configuration wizard.

Write to a JDBC DB
- Observe the WSDL created by the service adapter.
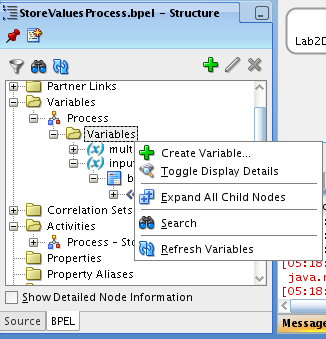
- Create a new variable of the type Lab2Collection_msg. Name the variable as var_multiple_lines.
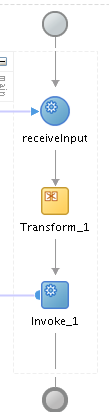
- Drag a transform shape and a invoke shape to after the receive input component.
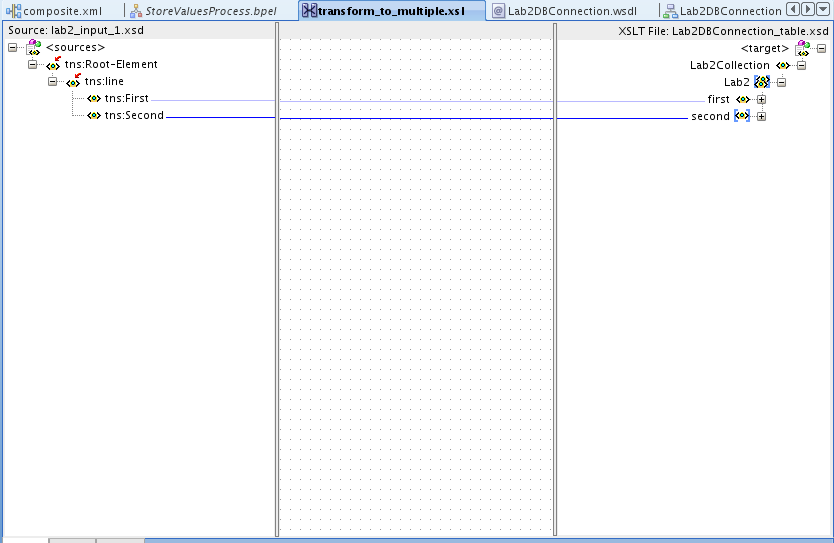
- Open the transform shape and use inputVariable as the source and multiple_lines as the target variable. Name the mapper file as xsl/transform_to_multiple.xsl
- In the multiple_lines.xsl graphical editor. Line the desired variables.
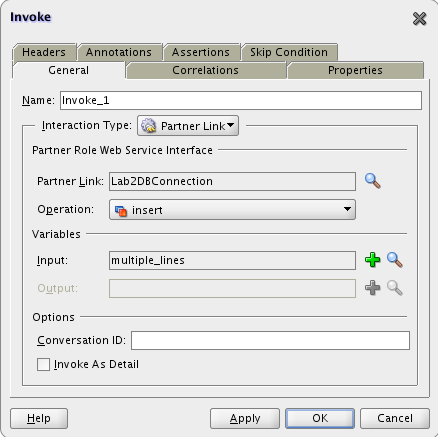
- Edit the invoke component so that its partner link is Lab2DBConnection. It is an insert operation and the input is the multiple lines variable.
- Deploy the process and test the results. First place a csv file in the input directory. Then, await for the process to consume it. Finally, connect to database and check the table contents
- sqlplus soa_user/welcome1
- SELECT * FROM lab2;